Schedule
Table of Contents
Scheduling Reports
Reports can be scheduled with a variety of options via the Schedule tab as shown below:
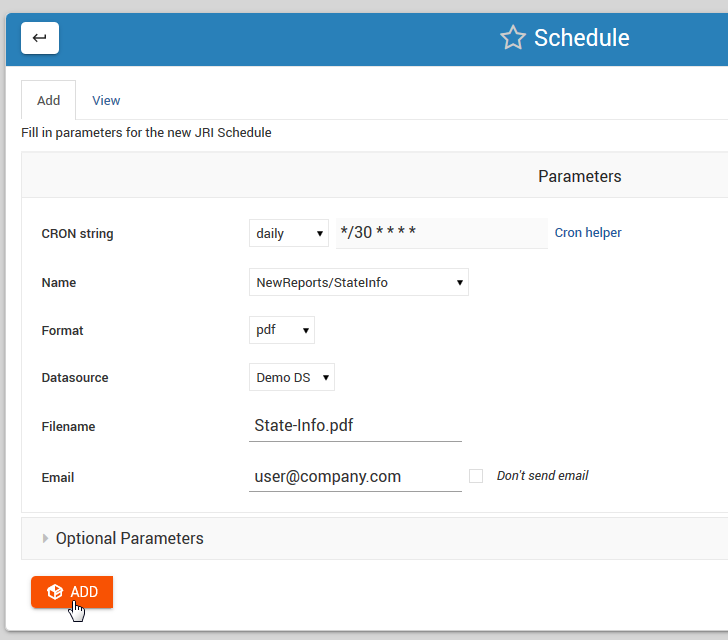
On the main Schedule page, click the Add tab to open the Create Schedule page as shown below.
Scheduling Options
The Schedule module offers the following options.
Execute:
Options:
   now
   custom
   hourly
   weekly
   monthly
now: This will run the report immediately, with no subsequent runs.
custom: This option allows you to enter a custom cron for running the report
hourly, weekly, and monthly are as stated.
Name:
Options:
   Drop-down list of all available reports
The Name field will display a list of all available reports. Above, we have select the NewReports/ClassReports we created earlier.
Format:
Options:
   csv
   docx
   html
   html2
   jxl
   pdf
   pptx
   rtf
   xls
   xlsx
Select the desired output format for the report.
Data Source:
Options:
   Displays a drop-down list of Data Sources you have created.
Select the desired Data Source for the report.
File Name:
Options:
   Enter the desired file name WITH Extension.
   Example: ClassReports.pdf
Enter the desired Data Source for the report.
Email:
Options:
   Enter email address or comma separated list of addresses for delivery.
Enter the desired Data Source for the report.
Note
If you do not wish to email the report, tick the “Don’t send email” box. This will run the report and save it to disk on the server. The report can be retrived via disk or downloaded via Reports tab.
Optional Params
The Optional Params tab allows you to:
- Set email subject
- Set email message
- Use Email HTML Template
- Add report parameters
Email Templates
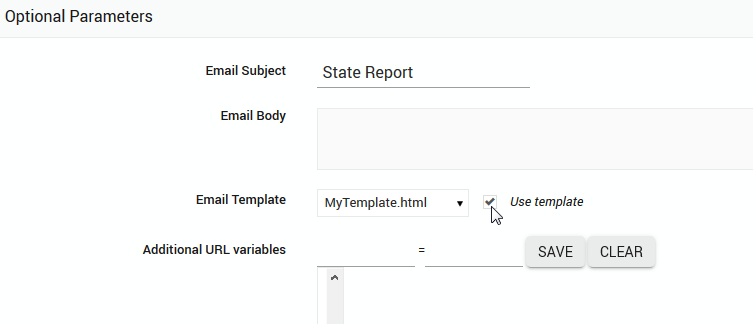
You can use HTML Email Templates you created by selecting the desired template from the drop-down list as shown below.
Note
Be sure to check the “Use template” box when using an HTML Template.
URL Parameters
To add a Report Parameter to the report URL, enter the variable in the left box and the value in the right box as shown below:
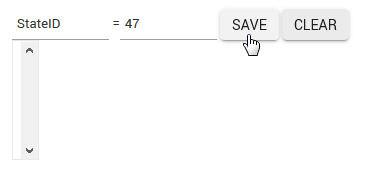
Click the Save button.
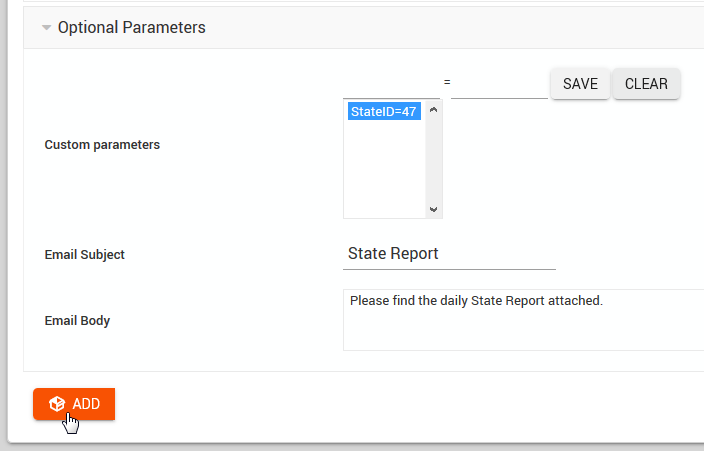
You can add as many parameters as you wish to.
Finally, click the Creat button to schedule the report.
Additional Examples
Below are some additional examples.
Send report every Tuesday at 1500 (3 PM)
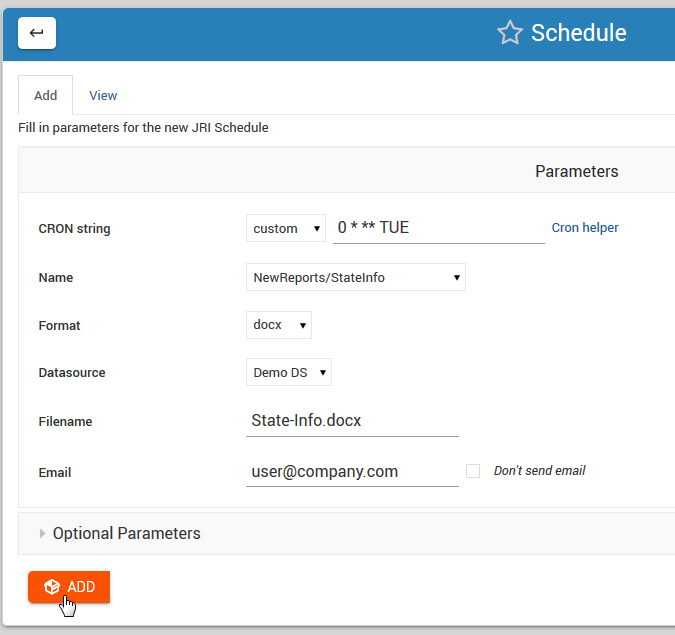
Send report every hour without email delivery
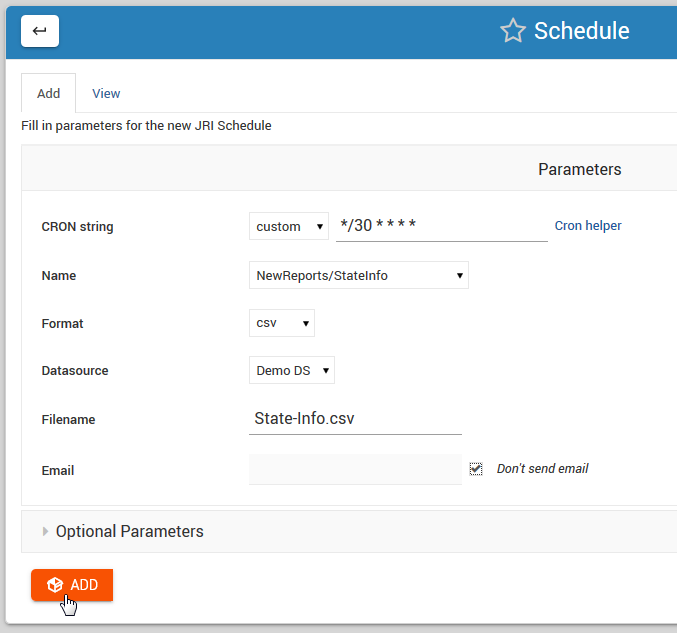
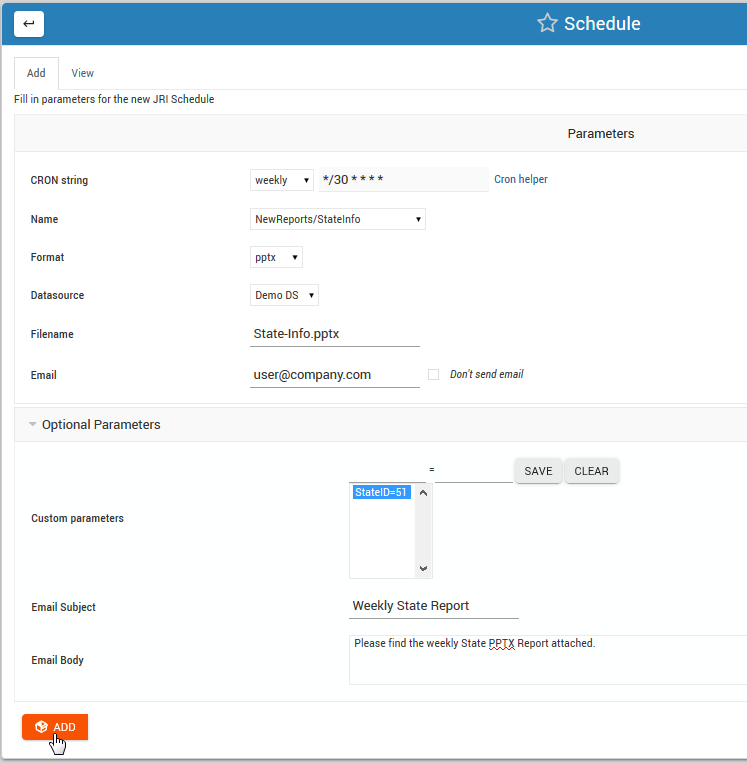
Send report weekly with StudentID = 51
